Processing for Android
Wallpapers
Use the Android Mode to develop interactive live wallpapers.
What is a live wallpaper?
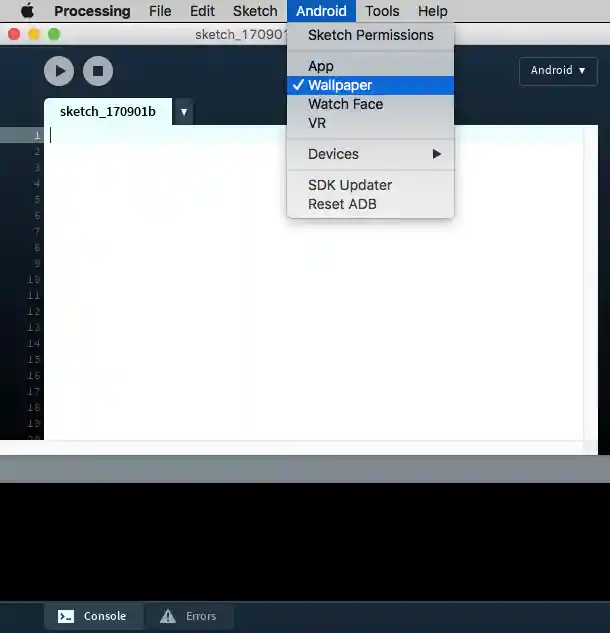
Live wallpapers are a special type of applications that generate animated and interactive backgrounds in the home screen of the device. Technically, they are an Android Service, designed to run for a long time in the background. With the Android mode in Processing, you don't need to worry about these low-level details, and instead focus on the drawing code. Virtually any 2D or 3D sketch can be built as a live wallpaper. All you need to do is to select the Wallpaper option under the Android menu:
Creating a wallpaper
Let's start by writing a simple wallpaper that just transitions the background between randomly selected colors. We will use the HSB color mode to create smooth transitions across the hue and the saturation of consecutive colors. We can test this sketch using Java mode first, to figure out the correct timing of the transitions. In our first version, we simply change the hue and saturation every 5 seconds without any transition:
float currH, currB;
int lastChange = 0;

void setup() {
  size(400, 400);
  colorMode(HSB, 100);
  currH = 100;
  currB = 100;
}

void draw() {
  background(currH, currB, 100);
  if (5000 < millis() - lastChange) {
    pickNextColor();
    lastChange = millis();
  }
}

void pickNextColor() {
  currH = random(100);
  currB = random(100);
}
We can now add easing to smoothly transition between the colors:
float currH, currB;
float nextH, nextB;
float easing = 0.001;
int lastChange = 0;

void setup() {
  size(400, 400);
  colorMode(HSB, 100);
  currH = nextH = 100;
  currB = nextB = 100;
}

void draw() {
  background(currH, currB, 100);
  updateCurrColor();
  if (5000 < millis() - lastChange) {
    pickNextColor();
    lastChange = millis();
  }
}

void pickNextColor() {
  nextH = random(100);
  nextB = random(100);
}

void updateCurrColor() {
  // Easing between current and next colors
  currH += easing * (nextH - currH);
  currB += easing * (nextB - currB);
}
Once you are satisfied with the transition and easing times, you need to replace size(400, 400) with fullScreen() before running the sketch on the device to make sure that the wallpaper uses the entire screen of the device.
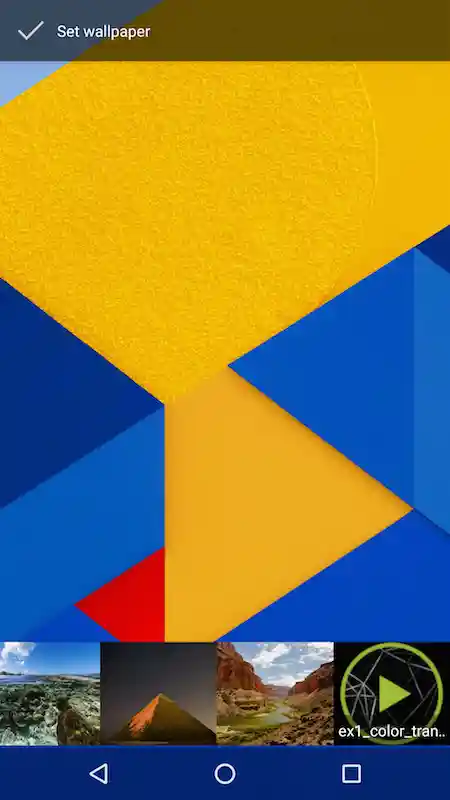
After the wallpaper sketch has been installed on the device, it won't show up right away. You need to open the wallpaper selector, and scroll through the availalable wallpapers until you find yours. The wallpaper selector will look different depending on the Android version in your deveice and what other wallpapers are installed, on Android 5.0 and newer it should look something like this:
Using sensor data in the wallpaper
In the sensors tutorial we saw how to use the sensor API in Android to read acceleration values. We can use the same technique to obtain sensor information needed to construct a compass. In this case, we need both accelerometer and geomagnetic sensor data, in order to determine the device's orientation with respect to the Earth's magnetic axis. We start with the following template:
import android.content.Context;
import android.hardware.Sensor;
import android.hardware.SensorManager;
import android.hardware.SensorEvent;
import android.hardware.SensorEventListener;

Context context;
SensorManager manager;
SensorListener listener;
Sensor accelerometer;
Sensor magnetometer;

void setup() {
  fullScreen(P2D);
  orientation(PORTRAIT);

  context = getContext();
  listener = new SensorListener();
  manager = (SensorManager)context.getSystemService(Context.SENSOR_SERVICE);
  accelerometer = manager.getDefaultSensor(Sensor.TYPE_ACCELEROMETER);
  magnetometer  = manager.getDefaultSensor(Sensor.TYPE_MAGNETIC_FIELD);
  manager.registerListener(listener, accelerometer, SensorManager.SENSOR_DELAY_NORMAL);
  manager.registerListener(listener, magnetometer, SensorManager.SENSOR_DELAY_NORMAL);
}

void draw() {
  background(255);
}

void resume() {
  if (manager != null) {
    manager.registerListener(listener, accelerometer, SensorManager.SENSOR_DELAY_NORMAL);
    manager.registerListener(listener, magnetometer, SensorManager.SENSOR_DELAY_NORMAL);
  }
}

void pause() {
  if (manager != null) {
    manager.unregisterListener(listener);
  }
}

class SensorListener implements SensorEventListener {
  float[] gravity = new float[3];
  float[] geomagnetic = new float[3];
  float[] I = new float[16];
  float[] R = new float[16];
  float orientation[] = new float[3];

  public void onSensorChanged(SensorEvent event) {
    if (event.accuracy == SensorManager.SENSOR_STATUS_ACCURACY_LOW) return;

    if (event.sensor.getType() ==  Sensor.TYPE_MAGNETIC_FIELD) {
      arrayCopy(event.values, geomagnetic);
    }
    if (event.sensor.getType() ==  Sensor.TYPE_ACCELEROMETER) {
      arrayCopy(event.values, gravity);
    }
  }
  public void onAccuracyChanged(Sensor sensor, int accuracy) { }
}
A couple of important things to note here:
- First, we get the context using
context = getContext()instead ofgetActivity(), as it is the case with regular apps, because there is no activity in the case of wallpapers. - The same event listener is used to get acceleration and the geomagnetic field, and we use the value returned by
event.sensor.getType()to determine which sensor we are receiving values from inonSensorChanged(). - The rate to read the sensor data is set to SENSOR_DELAY_NORMAL, which is the slowest from all the default rates. It is important to keep battery use in wallpapers at a minimum, as they run in the background constantly. So, when using sensors is a good idea to keep a low update rate that it is still ok for the purpose of generating the background. In fact, you can set a custom rate by doing:
int READING_RATE = 100000; // time in us
sensorManager.registerListener(listener, compass, READING_RATE);
The gravity and geomagnetic vectors encode all the information required to determine the orientation of the device in relation to the Earth's surface. The getRotationMatrix() computes the inclination and rotation matrices, from which we can obtain the orientation of the device in relation to the direction of the geomagnetic field with the getOrientation() function. The complete implementation of onSensorChanged() would read:
  public void onSensorChanged(SensorEvent event) {
    if (event.accuracy == SensorManager.SENSOR_STATUS_ACCURACY_LOW) return;

    if (event.sensor.getType() ==  Sensor.TYPE_MAGNETIC_FIELD) {
      arrayCopy(event.values, geomagnetic);
    }
    if (event.sensor.getType() ==  Sensor.TYPE_ACCELEROMETER) {
      arrayCopy(event.values, gravity);
    }
    if (SensorManager.getRotationMatrix(R, I, gravity, geomagnetic)) {
      SensorManager.getOrientation(R, orientation);
      azimuth += easing * (orientation[0] - azimuth);
      pitch += easing * (orientation[1] - pitch);
      roll += easing * (orientation[2] - roll);
    }
  }
The last step is to implement the drawing code for the compass. A simple one could be:
void draw() {
  background(255);

  float cx = width * 0.5;
  float cy = height * 0.4;
  float radius = 0.8 * cx;

  translate(cx, cy);

  noFill();
  stroke(0);
  strokeWeight(2);
  ellipse(0, 0, radius*2, radius*2);
  line(0, -cy, 0, -radius);

  fill(192, 0, 0);
  noStroke();
  rotate(-azimuth);
  beginShape();
  vertex(-30, 40);
  vertex(0, 0);
  vertex(30, 40);
  vertex(0, -radius);
  endShape();
}
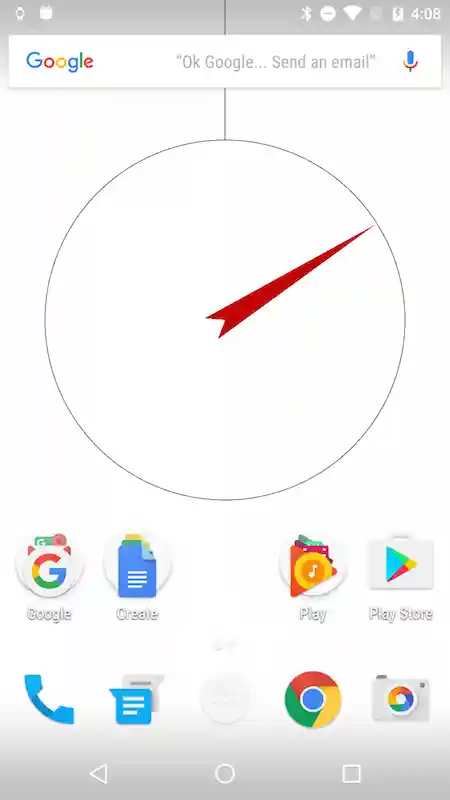
This should give us the following wallpaper:
The complete sketch code is available here.