Notice: Repository Deprecation
This repository is deprecated and no longer actively maintained. It contains outdated code examples or practices that do not align with current MongoDB best practices. While the repository remains accessible for reference purposes, we strongly discourage its use in production environments. Users should be aware that this repository will not receive any further updates, bug fixes, or security patches. This code may expose you to security vulnerabilities, compatibility issues with current MongoDB versions, and potential performance problems. Any implementation based on this repository is at the user's own risk. For up-to-date resources, please refer to the MongoDB Developer Center.
Liberate your data: From RDBMS to Vector Search, GraphQL & Mobile ... in minutes!
Reduce the time it takes to modernize your applications by freeing the data trapped in your relational database and migrating to the next-gen fully transactional DB of MongoDB Atlas.
Power it with advanced vector and textual search, enable consumption via a fully-managed GraphQL API, and expose data to mobile and edge consumers via the Realm mobile DB and SDKs.

Watch a walkthrough of this demo here

Prerequisites
- A target DB environment - MongoDB Atlas Cluster
- A source DB environment - PostGreSQL
- Install Docker Desktop
- The new MongoDB Relational Migrator - see Info for details.
- Install a Migrator Release
- An OpenAI Account with an API Key generated
- Consult the OpenAI API reference
- A tool to generate API calls - Postman
- Install Postman
- Upfront setup of the Production Atlas App is required as this contains triggers to automatically embed data as it is being migrated into the Atlas cluster.
- A mobile application coding environment - Xcode with Swift
- Download and install the realm-cli by running:
npm install -g mongodb-realm-cli
Steps to Show the Migration and Mobile Deployment
Clone the Github Repo
Clone the repo and change to the Repo directory
git clone https://github.com/mongodb-developer/liberate-data.git && cd liberate-data
Create a PostgreSQL instance in Docker
-
Build the image:
docker build -t liberate-data-postgres . -
Launch a docker container for the Postgres instance by:
docker run -d --name my-postgres -p "5432:5432" -e POSTGRES_PASSWORD=password --rm liberate-data-postgres -c wal_level=logical -
Validate the Northwind schema by running this command:
docker exec -i my-postgres psql -U postgres <<EOF
WITH tbl AS
(SELECT table_schema, TABLE_NAME
FROM information_schema.tables
WHERE TABLE_NAME not like 'pg_%'
AND table_schema in ('northwind'))
SELECT table_schema, TABLE_NAME,
(xpath('/row/c/text()', query_to_xml(format('select count(*) as c from %I.%I', table_schema, TABLE_NAME), FALSE, TRUE, '')))[1]::text::int AS rows_n
FROM tbl
ORDER BY rows_n DESC;
\q
EOF
The output should look like this...
------------------------------------------------
 table_schema |       table_name       | rows_n
--------------+------------------------+--------
 northwind    | order_details          |   2155
 northwind    | orders                 |    830
 northwind    | customers              |     91
 northwind    | products               |     77
 northwind    | territories            |     53
 northwind    | us_states              |     51
 northwind    | employee_territories   |     49
 northwind    | suppliers              |     29
 northwind    | employees              |      9
 northwind    | categories             |      8
 northwind    | shippers               |      6
 northwind    | region                 |      4
 northwind    | customer_customer_demo |      0
 northwind    | customer_demographics  |      0
Build a MongoDB Atlas Cluster
We build a small Atlas cluster to serve as the target DB and then as the back-end for the mobile app.
- Login to MongoDB Atlas: Login
- Create an Atlas Project named
Liberate Data - Create a single region Atlas M10 cluster named
productionat version 6.0+. do not use another name - Create a db user named
demowithreadWriteAnyDatabasepermissions. - Add your IP (or 0.0.0.0.0) to the Access List
- Get your cluster connection string.
MongoDB Relational Migrator
In this segment, the PostgreSQL DB will be migrated to the MongoDB cluster.
- Start the Mongodb Relational Migrator app - or click to reconnect Migrator
- Click
Import project fileand select the project file:./relational-migrator/liberate-data.relmig - Inspect the Relational and MDB diagrams. Notice how the
orderscollection uses the Extended Reference schema design pattern to store most frequently accessed data together. - The destination
orderscollection should look like this: - Perform the database migration
- Start a Data Migration Job by clicking on the other top tab along side Mapping
- Click on
Create sync job - Connect to your Source DB (postgres)
- Postgres Credentials: Username =
postgres/ Password =password
- Postgres Credentials: Username =
- Connect to your Destination DB (Mongodb)
- enter the Mongodb Connection string (use northwind db)
- Like:
mongodb+srv://demo:demo@production.3sov9.mongodb.net/northwind?retryWrites=true&w=majority
- Click Start
- When this job is complete, validate the outcome in the MongoDB cluster
- In the Atlas UI, ensure all the collections were migrated.
- Inspect the
orderscollection. The most frequently accessed data fromorderDetails,product,customer&employeeshould be nested.

Enable MongoDB Atlas Search
These steps build Search indexes on the orders and categories collection enable one to run queries via Atlas Search.
Configure MongoDB Data Services
Now we careate a public/private key pair that will be used to authenticate the realm-cli.
- Create an API Key Pair. Save these values for deployment in the production-app in the next section.
- Description:
Liberate Data - Project Permissions:
Project Owner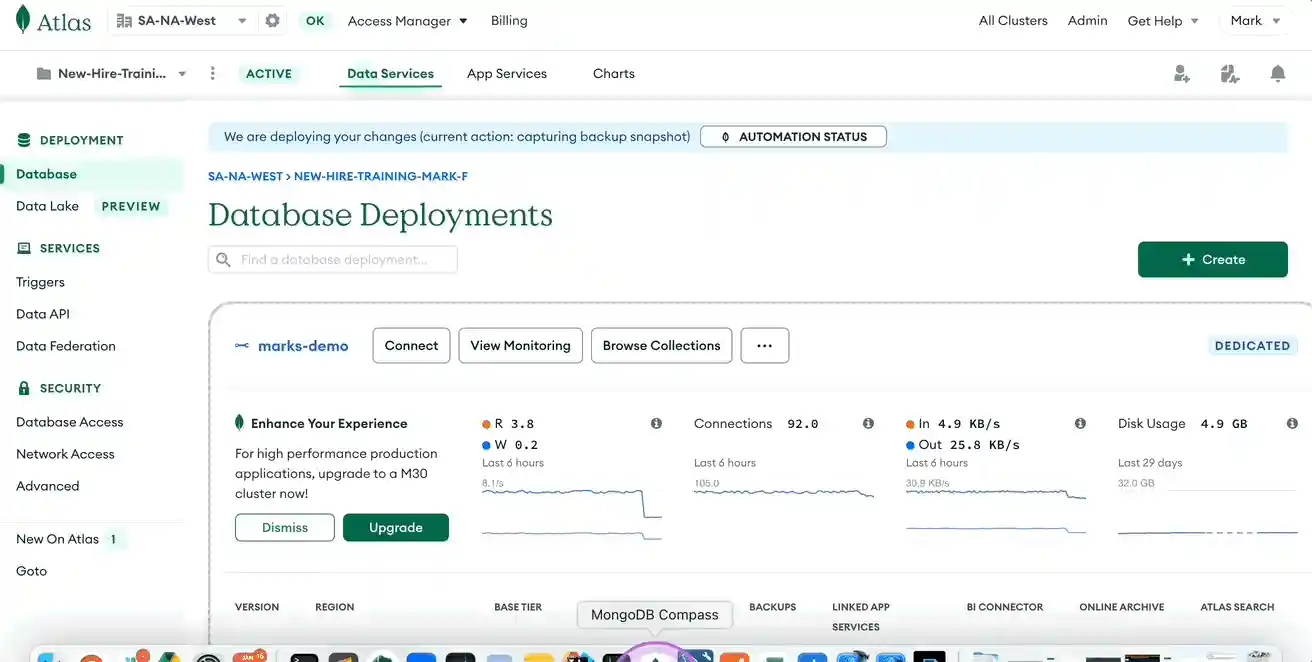
- Save Key Pair to Terminal variables

export PUB_KEY=<REPLACEME>
export PRIV_KEY=<REPLACEME>

Setup MongoDB Atlas App Services
In this section, you will deploy an Atlas Application production-app from your local machine to Atlas. production-app contains all the preconfigured Linked Data Sources, Rules, Schema, Device Sync, GraphQL, Functions and Custom Resolvers you will need to complete this demo.
-
In a terminal shell, authenticate to the realm-cli by running this:
realm-cli login --api-key $PUB_KEY --private-api-key $PRIV_KEY- If prompted with
This action will terminate blah blah blah, just proceed withy - When you see
Successfully logged in, chances are you're successfully logged in.
- If prompted with
-
Deploy the production-app from the root of this repo project.
-
NOTE: If your cluster is not named
productionthis command will fail. Either create a new cluster namedproduction, or update theconfig.clusterNamein the config.json -
Then run this:
realm-cli push --local app-services/production-app
-
-
Accept all the default prompts. The following message indicates success:
Creating draft
Pushing changes
Deploying draft
Deployment complete
Successfully pushed app up: production
Configure the App Service
Now finalize the application setup by creating an application API key which will be used in the next steps.
- In the browser for your MongoDB Cluster, click on the App Services Tab.
- Click on the Production App item.
- Grab the App Id value - should be something like: production-app-xxxxx
- Now, go to Authentication from the left panel
- Click on the
EDITbutton for the API Keys row andClick create API Key- capturing this value too. - Now click on GraphQL from the left panel and capture GraphQL Endpoint value.

- Add your OpenAI API Key in the
openAI_secretin theValuessection

Validate the App Service Deployment
Walk through the following steps to show that the app service is configured properly.
- Linked Data Sources: Inspect that the
productioncluster is linked as the data source. - Rules: The
orderscollection should have thereadAndWriteAllrole. All other collections should have thereadAllrole. - Schema: Ensure the schema for all collections is defined. The schema for the
orderscollection should define required fields as below in addition to their bson types:
{
  "title": "order",
  "required": [
    "_id",
    "customerId",
    "employeeId",
    "freight",
    "orderDate",
    "shipAddress",
    "shipCity",
    "shipCountry",
    "shipName",
    "shipPostalCode",
    "shipRegion",
    "shipVia",
    "shippedDate"
  ],
  ...
}
- Authentication: Two authentication providers should be enabled:
email/passwordandAPI Keys. The API key nameddemowas created by you. - Device Sync: Flexible device sync should be enabled, set to the linked atlas cluster and the northwind database.
- GraphQL: All entity types should be defined along with two custom resolvers named
searchOrdersandvectorSearchOrderswhich are linked to the Atlas Functions namedfuncSearchOrdersandfuncVectorSearchOrdersrespectively.
Use Postman for API testing
This step will allow one to run queries via GraphQL. This will show that the API is working as expected.
-
Startup the Postman app and import the collection file: ``postman/liberate-data - GraphQL.postman_collection.json```
-
In My Workspace, Click Collections in left panel.
-
Click on the "Liberate data!" heading and then in the middle panel, click on Variables.
-
Then enter the three variable
api_key,atlas_app_id, andgraphql_api- using the values previous gathered in the CURRENT VALUE column.- Note: Obtain the GraphQL API (
graphql_api) endpoint value from the GraphQL section in Atlas App Services.- See this diagram from an example:
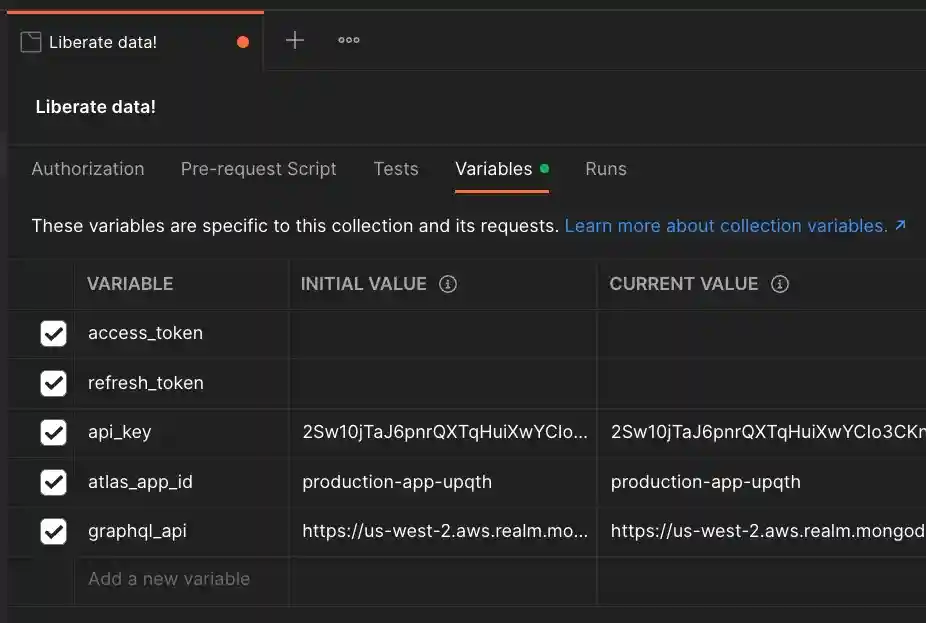
- See this diagram from an example:
- Note: Obtain the GraphQL API (
-
Click Save
-
Execute the 1st POST operation
Auth: Get Bearer & Access Tokento authenticate and obtain tokens by hitting the blue Send button. -
If successful, copy/save the value of the output
access_token- without the quotes - to be used in the other queries. -
Now, execute any of the other operations after inserting the
access_tokenvalue in the Authorization tab. Feel free to change query values. -
The
Vector Search: Semantic search on Ordersoperation uses a custom resolver which in turn executes an Atlas Vector Search pipeline. This pipeline is implemented in thefuncVectorSearchOrdersfunction and performs a real-time embedding of the search string against OpenAI and performs a vector search. -
The
Search: Orders by search stringoperation uses a custom resolver which in turn executes an Atlas Search pipeline. This pipeline is implemented in thefuncSearchOrdersfunction and performs a fuzzy text search on theorderscollection, plus a union ($unionWith) and join ($lookup) to thecategoriescollection, thus performing a text search on orders and categories.

Swift mobile app with Realm SDK
This segment shows a mobile app built with MongoDB Realm for an Apple iPhone communicating with a MongoDB Atlas database.
- Start up Xcode
- Open the the Swift app called
App.xcodeprojunder the app-swift folder. - In the App section, open the Realm object and replace the
appIdandappUrl. Compile and run.- The
appIdwas captured earlier. - The
appUrlis found on the browser by by clicking on tApp Servicesproduction-appand copying the URL up to the/dashboardending. 
- The
- In the mobile app, register with a new user via an email and password.
- Browse orders. For the purpose of this demo, all users have access to all orders.

Atlas Device Sync
In this final segment, one can show Atlas Device Sync. This shows changes in data are propagated from Mobile App to Atlas Cluster (or the reverse) immediately.
- Modify an order using the mobile app.
- Open the same Order document in Atlas or Compass and notice the changes. Now modify the same order and the changes will be reflected on the mobile app. Atlas Device Sync works.
- Finally, run the
Mutation: Change a Sales OrderGraphQL operation in postman. Change the Order ID and any fields in the order body. The changes should reflect in the mobile app.